


I just purchased my axiom how do I get the lifetime membership?


**NOTE: GET A FREE GPAA LIFETIME MEMBERSHIP WITH PURCHASE OF THIS GARRETT AXIOM DETECTOR**
Do you know that Garrett started the Australian gold rush in the late 1970s with the Garrett Groundhog, and that the Groundhog found the Hand of Faith nugget in Australia?
On the personal side, the Groundhog was the first commercial detector I ever bought and the first commercial detector I found gold with.
I was intrigued but also concerned that the Axiom wouldn’t be innovative enough to make it stand out as a high-level detector. Now, after a few months of using the Axiom detector, I will say that Garrett nailed It.
When I first heard about the Axiom, I had two questions for the Garrett team: Was this an overhaul of the ATX or the newly acquired White’s TDI, and did it really have full tone control?
Steve Moore was very quick to assure me that this was a new build and not a remake or an upgrade of any prior Garrett or White’s detectors and that yes, it had full tone control. At that time the Axiom was getting into the hands of a few of their testing team and in mid-October 2022 one arrived at my door for testing and review.
Since then, I have hunted exclusively with the Axiom in many states, different conditions from sunny and warm to brutally cold with snow and frozen ground, and wildly varying soil conditions, and found gold. Let’s take a good look at the Garrett Axiom and how I use each of its features.

AX in the box: Everything detector-wise you need to get out on the gold. A good pick, knee pads and confidence is all you need to add.
AXIOM NEWTECH FEATURES
ULTRA-PULSE™
Garrett created Ultra-Pulse timing to broaden the range of gold that can be found with the Axiom. There are four distinct timing settings: Fine, Normal, Large, and Salt. Each timing setting uses extremely fast, multiple-pulsing signaling, then coupled that with their new signal processing system to measure target response and decay in a way that forces even the smallest targets and larger deep targets that I hit to have more of a recognizable target response.
TERRA-SCAN™
Is a new technology development by Garrett that uses multi-channel ground balancing, which reads the base ground mineralization and its variations and any additional mineralization such as hot rocks (ironstone) then processes all the mineral information and reduces the ground response that is sent to me.
My Testing:
As I shared above, the Axiom uses four pulse timing modes: Fine, Normal, Deep, and Salt. When I first started with the Axiom, I used the factory default of Fine to start out within the test beds. I knew at once that Fine would be my favorite mode.
I started in the beds using the 11-inch mono coil with 3- to 5-grain targets.
Fine mode nailed every signal, albeit it did struggle a bit with two targets in extreme mineralization. Moving to the larger deeper test targets, based on the hits within the 3-5 range, I was not surprised by the excellent reaction within the 5- to 10-grain targets. Moving to larger targets — 1 gram to 15 grams with depths ranging between 8 inches and 16 inches, with low, medium and high mineralization and hot rocks — the Fine mode began to lose the deeper smaller targets in high mineralization and fared very well in the low to moderate ground, hearing the majority of the targets.
This quickly became my go-to prospecting mode: FINE - track OFF.
I repeated the same test with the 13-inch mono coil and clearly detected all but two of the targets. One was a 3-grain target and the other an 8-grain at depth, both in high mineralization with mixed iron and basalt stones. The 11-inch mono was a little noisy but workable while the 13-inch mono was more susceptible to the high mineralization, as I expected.
Normal mode: Leaving the 13-inch mono on the Axiom, I repeated all tests. In Normal, almost all of the ground mineralization was easily worked through, and I was able to find all targets with the exception of one 3-grain and one 5-grain target in moderate to high mineralized soil. It did extremely well on all of the medium to large targets at all depths. I liked everything about the Normal mode except I knew I may miss very small targets, and even though it was reactive to the targets it did detect, they were not as sharp on the smaller targets as the Fine timing was. The smaller targets just sounded mushy to me.

Large Mode: with the 13-inch coil: This timing ripped through all the larger medium and deep targets with no issues, handling all but the worst of the iron stones and basalt without working to track them out. On the smaller targets, the performance was not very good, which was as expected. I’ve jokingly said in the past that modes like the Axiom Large is like driving down the road and you’re focused on the destination; the fence posts along the road are just something you are passing by.
Salt Mode: I have not been to a location to test the Salt timing at the time of this review.
My conclusion on these tests is A: I found my favorite coil and timing — the 13-inch mono coil is for me the perfect coil — and B: The Fine will be my go-to. I will use Normal in new areas where I quickly want to get a lot of information about the ground and the targets and Large for finding and proving new nugget patches with the 16-inch coils.

TONE – Adjusting the tone to your hearing matches targets to your hearing range. Perfect for hearing even the slightest signals.
Terra-Scan's ability to expand and evenly eliminate ground mineralization during ground balancing without reducing or eliminating targets is a major step in Garrett’s PI detecting.
In this section, I will be referring to “hot rocks,” which covers both hot rocks (iron stone) and cold stones (Basalt, and similar)
In my test bed, I have a section that includes sub-gram targets (5-grain or 1/3 of a gram) with different mineralization levels from almost benign to extremely mineralized plus hot rocks in many of these sections to test signaling and ground balance responses. These responses give me a detector’s overall ability to either eliminate or lessen the hot rocks responses, without diminishing or removing good target signals.

01 VCO – My old familiar friend.
Targets in this section are 5-grain, and I used Fine mode, 11- and 13-inch mono coils, and manual GB on the first pass. The Axiom overcame the high-ground mineralization and all but two of the hot rocks. Even though the hot rocks were not completely diminished, the response was lessened to a point where the good target signal was separated from the ground responses.
My second pass was made with the same coils using a different GB process to try to eliminate the remaining hot rocks and overcome the higher mineralization. Instead of only pressing and holding the GB button and pumping the coil up and down until the unit stabilizes, the hot rocks process adds additional steps that are quick and simple to perform. One is ground balance over a known hot rock until it is eliminated. If that does not remove the hot rock, press and hold the GB button down while raising and lowering the coil to the ground next to the hot rock, then slide the coil sideways over the target, then release the GB button. Using this method, I eliminated all but one basalt stone, iron stones were eliminated or lessened enough to separate the signals, and the hot ground was equalized.

Speed settings of the Axiom, not the speed you want to swing a coil.
I repeated all tests with the 13-inch mono and 16-inch mono coils. The 13-inch mono had the same responses to the targets as the 11-inch in the highly mineralized ground.
The 16-inch mono coil did respond to most of these targets, some with a very slight response. Had someone not known the exact location of each test target as I do, they may have walked over them. This is somewhat expected with a large coil and very small targets, which made these tests a success.
GROUND BALANCE WINDOW (GBW):
There is a feature that I consider an advanced feature of TERRA-SCAN that when I first heard about it, I was more than skeptical. It is the Axiom’s ability to remove or minimize a multiple and compacted area of hot and cold stones while maintaining the ground’s average and not — or less significantly — affecting good targets.
I know, sounds too good to be true, right? In areas where no matter how far I pushed manual ground balancing I was not able to remove some of the hot rocks when using a mono or DD coil without affecting the Axiom’s overall ability, I switched on this feature only when I have surface and subsurface hot rocks that I cannot balance out or lessen its signal.
I press and hold the GB button for 10 seconds until I hear a double beep. Continuing to hold the button down, I swing over the area. While I am doing this the hot rocks signal will begin to diminish. When it is at a point that I like, I release the GND BAL button and swing over the area a few times to hear the result. In most cases, the hot rocks were removed or reduced enough to allow me to be able to detect good targets and not have constant false signaling.
Out of all of Axiom’s features and functions, this is by far the one that I spent the greatest amount of time testing outside of my testing beds. I used many different types of hot and cold rocks, varying sizes of gold targets and varying soil conditions. In all my testing, I was able to eliminate or lower all hot rocks response to a point that the ground mineralization was workable, and all good targets were clearly heard in most of the test with subtle but clear responses in the extreme ground. I only use this in areas where I cannot lessen their effect through ground balancing, changing coils, and adjusting my detecting style, or where the hot rocks are not on the surface and easily kicked out of the way but buried as well and when digging signaling hot rocks does not change signal strength when on the surface.
I will use this advanced feature sparingly and only when necessary.

GND TRACK:
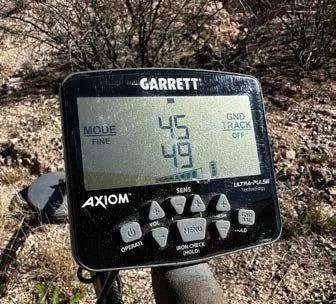
I am an audio detectorist over using any VDI display signal response or information and did not feel that the mineralization metering would have much to offer me. I am used to hearing subtle changes in the ground and am quick to react to those slight changes. However, using audio only does create some disadvantages, the most significant not being able at times to know if the ground is going up or down in mineralization. In the test bed, I found that I was using the mineralization metering more than I thought I would when detecting in tracking speed. I found the tracking meter to instantly show the ground mineralization numerical value trending up or down by the arrows beside the numbers a valuable tool.
I use tracking only in areas where ground minerals become so varying and/or severe that I cannot overcome them with a DD coil with manual balancing. Even then I will use the slowest tracking speed possible and adjust my detecting style accordingly. As you increase tracking speeds you can lessen a detector’s depth and sensitivity to targets. Plus, in a tracking mode, the detector is constantly reading the ground and the audio signals you receive are based on the processes averaging. Meaning, you could move from an area where tracking was required to ground that could have easily been detected in manual ground balance and may not realize it.
This is where the mineralization metering excels to maximize the Axiom’s capabilities in the ground I’m detecting. The reaction time is extremely fast and as soon as I see stabilization in the ground mineralization values, I immediately move back into manual balancing. There are three selectable tracking speeds on the Axiom. Each is designed for worsening ground mineralization. SLOW is where I always start for conditions that cannot manually be ground balanced out when using a DD coil. If the Axiom is not stabilized in SLOW, I’ll move to MED, and if all else fails I’ll move into FAST.
I’ve always considered tracking a necessary evil and a last resort when everything I do does not stabilize the soil; it's just my style of detecting. I have a detecting partner that seldom uses manual ground balancing. It is a personal preference.

In the areas where I tested the Axiom outside of my test beds, I found one spot where after changing to a DD coil that the detector would not stabilize in manual because of wildly varying ground. I used slow, which was stable and the ground detectable. I tested medium, which was dead quiet and more tracking than necessary for the area. Aside from the test bed, I have not used any tracking above slow, yet.
As a final observation, I believe that TERRA-SCAN has increased the overall ground balance performance to where I can stay in manual longer, and when I do move into tracking allows slower tracking speed in areas where I would have had to move to a faster speed.
FREQUENCY SCAN:
With Pulse Induction detectors, for all they offer, there is one unseen but well-heard foe of detecting: Electromagnetic Interference or EMI. EMI in some areas can be so extreme that it makes PI detecting almost if not impossible. Power lines, aircraft flight paths, wireless transmissions, atmospheric conditions, even the cellphone in your back pocket generate EMI. It is not a matter of whether they can, they do create EMI. The Axiom has a two-stage system to eliminate or reduce to a level that allows detecting in almost all scenarios. Yes, I am very cautious in not saying all scenarios. I detect in areas of multiple sources and extreme EMI. I can beat back one, but extreme multiple sources at the same time is asking way too much for any detector.
The process is simple: from the menu choose “FREQ SCAN.” Hold the Axion perfectly still and let it do its thing. The Axiom will scan 100 channels (I call Rough) then it will take the five quietest channels, rescan those (I call Fine), and ultimately choose the quietest single channel. In the field, I found that with the Axiom drilling down to a very fine EMI window, it is extremely easy for me to hear the highs and lows created by EMI in my threshold. Hearing the slight bump offensive noises caused by EMI allows me to retune to the current EMI conditions and continue detecting in all but the worst cases. EMI conditions are always present in today’s world, and they will change throughout the day. I will do a few frequency scans during the day. As quickly and as efficiently as the Axion is on removing EMI, it is well worth the few minutes a day spent.
To understand how important of a role EMI plays in detecting, follow this link to the FCC Cellular map. This shows the coverage of all major carriers. This is only cell service; there are thousands of other wave carriers around us every time we turn on our detectors. https://bit.ly/CellEMI
AUDIO PMW – VCO:
The Axiom has two very distinct audio settings: Pulse Width Modulation (PWM) and Voltage Controlled Oscillator (VCO). PWM is audio reacting comparably in volume to the target’s signal strength with a non-changing signal pitch. I can easily see why a detectorist coming from the coin, relic, treasure hunting side of detecting or if I was in a Civil War battleground, I would use PWM. The bigger the target the bigger the signal and the target retains the same pitch. When nugget hunting, though, sorry gang, I’ve been swinging PI machines too long to give up my trusted and very familiar VCO in the patch. What VCO offers is that the volume increases as I move onto a target, but unlike PWM with a set pitch, VCO target pitch rises as well. For me, I get more target information on a signal in VCO and a much smoother threshold that allows me to clearly hear almost null targets. Dual audio was a smart move on Garrett’s part that allows me to have both PWM and VCO for all the types of detecting that I love.
TONE:
Hear me loud and clear when I say this: Tone is, to me, one of the most important settings on the Axiom. I could very easily write an entire page on the importance of tone control. Simply put, You cannot find what you cannot hear. Everyone hears differently. It might be subtle, or it could be severe. I have hyper-sensitive hearing in one tone range and am almost deaf in another range. The ability to be able to tune a detector’s tone is massive for me and countless others. And with the Axiom, it’s something that I do before the first swing of the coil every time I detect. I will also check and adjust my tone throughout the day as needed.
To access the tone adjustment, press the menu button until TONE is boxed in, and use the + and – buttons to adjust the tone up or down until the detector sounds like it just got louder and stop. The loudness is not a result of volume; it is the result of matching the detector’s tone to your hearing, Here is a YouTube link to a video that I made recently where everyone in the room picked a different tone range and a longer explanation of how important this really is: https://bit.ly/ToneControl.

SPEED:
The speed setting is a primary setting that is extremely useful in setting a coil speed coupled with target separation and recovery speed — all of this is called Reactivity. Coin, relic, and treasure hunters truly understand Reactivity and set their detectors accordingly. My concern is that some may not fully understand Reactivity and may consider speed as an invitation to whip the coil to make the Axion match their swing speed, which is generally, too fast. I have helped a lot of Detectorists become more successful by getting them to do one thing, slow down. Rant over. The Axiom has three coil speed options, SLOW, MED, and FAST with the factory preset being MED.
Slow
I prefer Slow. It offers me the best depth and a very smooth threshold. Slow also gives me a little more responsiveness based on the sensitivity settings when matching the Axiom to the ground. But because I am running at a slower coil speed, the reactivity is going to be much slower and if I am detecting an area with targets close to each other there is little to no target separation.
Medium
Medium doesn’t have the pure power of Slow and is not as good at target separation as Fast. Medium gives me a modest coil speed and better reactivity over Slow, which leads to slightly better target separation. Where this excels for me is in the information that helps to better understand the ground and the targets in a new area.
Fast
Fast lets me use a faster coil speed (not whip speed) and gives the best target separation with faster reactivity. But that generally comes with a price. There is a high chance that EMI will increase and ground noise. In my test beds, I was able to virtually eliminate a 3-grain target when using Fast too fast, then slowing down my coil so the target was again a good target. For my detecting, Fast is a valuable setting used in the right way. I will use Fast with the 16-inch mono coil, large timing while patch hunting. The moment I get a signal, if it is gold, Fast is off the menu.
IRON CHECK:
PI detectors are not known for exceptional iron discrimination. In my opinion, the Axiom Iron Check falls in at the high end of trustworthiness. Ultimately it is the operator that has to make the call to dig or pass. I only pass when I have confidence that the signal is iron. Using the Axiom and my trusted 360 I have not been let down so far. The 360 is doing a complete 360-degree circle around the target. With Iron Check activated, if there is any change in the signal, I’m digging it. So far all that I’ve dug that I 360ed with no variation in signal were iron. There was one target that I dug because it did have a change in the signal: it was a small flat iron chunk with what was left of a small bit of brass tag under an aluminum rivet. That could have been a gold nugget. The signal was more of a stall in the Iron Check, and it was repeatable.
The Iron Check mode for the Axiom is only available when using a DD coil, which is the norm for PI detectors and nothing new. It is extremely easy to use and is always at your fingertips — the menu button with a press and hold activates the circuit. Swinging over an iron target will give you a low tone. If you are in an area that warrants using the Iron Check, please consider always using the 360 method and listen very closely for any disruption in the low tone.
SENSITIVITY:
There are two thoughts on sensitivity settings: one, flat out to the max and two, matching the sensitivity to the ground you are working. I match my detector to the ground where I am working. This allows me to really focus on the sounds that I hear with a lot less unnecessary noise. And this is the way that I have been working the Axiom since day one. I have trained matching sensitivity to an unknown number of detectorists, and they have thanked me for teaching this and they have been very successful. However, for the Max-Out crowd, I did spend an afternoon at max sensitivity. The Axiom was very workable in max sensitivity, and I was able to hear all the targets in max as I did in matched, although some were almost lost in the background. I am just not appreciative of the extra noise floor; I think some of this has to do with my hearing. That said, sensitivity is a user preference. I will, however, recommend that Axiom owners start in the factory preset and spend some time getting to know the Axiom.
Sensitivity settings on the Axiom are straightforward + or -. If you choose to match to the ground, press the SENS button to lower (-) the sensitivity, then ground balance, set the threshold, and with the coil flat and stable just above the ground (I use a chunk of 1x4), + the SENS until the threshold becomes slightly unstable and back it off (-) one.
My first thought on the sensitivity when looking at Garrett’s sliding scale was that the Axiom would fall short of having a broader range of sensitivity for my preferred type of gold detecting. What I found very quickly is that Axiom’s sensitivity range is superior to any Garrett gold detector I have used in the past, and tuning it to where I want to detect is exceptionally easy and fast. And although, as I shared earlier, I am not a max-out sensitivity hunter, if I was, the Axiom does that very well.

Little Used – I do like the compact size, just a bit over 25” collapsed
Threshold:
I do love a good stable threshold. After all, it is the voice of the detector. For me, I have requirements for a threshold, that it be stable and rhythmic. And not to beat up on Garrett, it is something that has been lacking over the years. The Axiom has met my requirements. The stability requirement is that it does not drift, and this is what allows a threshold to be tuned precisely enough to have two roles. First is that a tuned threshold is constantly giving me information on the ground I’m detecting, sometimes in a very subtle way. The second is being able to dial in the threshold to hear the sometimes almost hidden rhythm of a perfectly set threshold. Why this is so important to me is that not all signals are signals. Some of the smallest or largest, deepest nuggets I have found have been little more than a change in the rhythm of the threshold. And that is where a few of the smallest pieces of gold I have found with the Axiom lived; just a waver in the threshold and not a clear signal until I boot scrape the surface. Now for anyone coming from the VLF side that is dependent on their threshold, you should know that a PI threshold is extremely different from VLF, and you may struggle with it for a short time. Don’t push the river, it will come.
I debated with myself about going over every little detail of setting up the Axiom to go prospecting. Since I covered the majority of the standard controls and the new advanced features of the Axiom and how I use them, I’ve decided that a picture says more than a thousand words. I have included two photos from the Axiom manual that show all the buttons and their functions and the LCD screen with descriptions of what you will be working with. There is one LCD control panel feature that I did not include in this testing because I seldom use it and then only use the Signal Strength Indicator to verify certain targets that I question. The SSI is a bar graph that shows signal strength and target polarity coupled with high and low tones. The SSI indicator is a practical tool that many detectorists use on all targets with great success.
Additional features of the Axiom.
The Axiom that I received was a prelaunch testing unit. There are accessories that I did not receive and coils that I did receive that are not included in the Axiom standard packaging.
The layout of the control panel for me is intuitive and all the functions are easy to navigate using only my thumb, even with gloves on. With some of the buttons being multi-function, once I got used to the functions, I seldom look at the button layout to operate the Axiom.
And before you ask, the control box and panel are rainproof, not waterproof.
The Axiom comes in at 4.2 pounds with the 11-inch mono coil, making the Axiom the lightest by a smidge in the class of comparative detectors. The Axiom was designed with a great deal of consideration and utilizes a lot of carbon fiber, creating excellent ergonomics and balance across the entire line of coils. This makes long days in the field very easy for me. I do use a bungee system for convenience and swing control, yet even at a little over 4 pounds it is nice to have after hours of detecting.
Battery life is rated to 16 hours. I don’t feel that I pushed the battery limit on any of my trips out. I have gone two full days on a single charge several times with no issues. The current Axiom kit also includes the battery booster kit, which gives you an additional 6 hours from 8AA batteries. My kit included all charging cables and adapters for wall and auto charging options. I did not receive the booster kit and cannot speak directly to the unit, but from what I have seen it is a clever design that slips the battery pack into the ground stand and plugs directly into the charging port via USB-C.
The Axiom included Garrett’s Wireless Z-LYNK system built into the unit and their MS-3 wireless headphones and charging cable. The MS-3 phones paired to the unit immediately with no issues and have performed flawlessly since day one. I also paired the Z-LYNK with a set of my tethered earbuds for those days in the desert when full headphones are a burden. So, there is no excuse to not wear headphones of some type.
The coils that I used for my testing included the • 11x7 Mono coil
• 13x11 Mono & DD coils
• 16x14 Mono coil
The factory coils are extremely lightweight, waterproof, and balance perfectly with the Axiom frame. All coils are responsive, highly sensitive, and very well-built.
And with all of this, I received a very functional carry bag/backpack.
Overall Thoughts:
I walked into testing the Axiom with high hopes and a great deal of skepticism starting the field test. Now after three months of pushing the Axiom to its limits and beyond in many cases, I will definitively say that Garrett has met or surpassed virtually every test that I threw at this detector. I can easily say that Axiom is the most substantial development in PI detecting for the Garrett brand, ever.
Technologies that Garrett introduced with the Axiom are significant. Garrett’s TERRA-SCAN™ technology is tech I didn’t see coming and didn’t expect to be as powerful and as accurate as it has proven to be in my testing. It is a huge gain in mineralized soil and hot rock workability.
Garrett’s ULTRA-PULSE™ is another breakthrough tech for Garrett. I feel that the Garrett team took now-common modes and expanded functionality over a broader spectrum, allowing me to easily detect gold in areas and sizes that have been challenging in the past. The Axiom’s ability to even find gold in the sub-1/3-gram category has more than surprised and impressed me. The Axiom’s overall capabilities for finding small and large gold are excellent. And although the largest nugget I have found to date is 7 grams outside of my test beds, I am confident that when I do swing the coil over anything larger it will be in my pocket.
The only real pushback that I have gotten on the Axiom is based on its price point. Most detectorists I have talked to or let use the Axiom when I have run into them in the field do not believe that an advanced Pulse Induction detector like the Axiom could have a $4,000price tag. They feel that there must be a lot missing in functionality until they, like me, use the Axiom. I do not know how Garrett established the pricing; my best guess is that between Garrett Electronics and other companies that Garrett has decades of relationships with, and of course being in the Dallas, Texas, area with manufacturing companies like TI and STMicroelectronics and others, may play a big part in this.
The bottom line for me is that I have used and most likely abused the Axiom and I know I have pushed the Axiom well past the intended limits, and have in all but a few instances been satisfied with the outcomes. The Axiom, in my opinion, may not be at 100% of its potential yet. And now that it is in the hands of more than field testers, I know that Garrett is listening to all of the feedback, and I am sure making changes based on the majority over the minority of pre-launch detectorists.
This leads me to one feature of the Axiom that I left until the end of this review. The Axion is updateable. When updates to the machine are available, they will be downloadable from the Garrett website. The Axiom comes with a USB cable to install updates from your computer. I installed a prelaunch update after getting the detector and the process was simple and straightforward.
I expect that as the Axiom becomes more prevalent on the PI stage, others will agree that the Axion is a rock-solid detector that I can depend on to find a wide spectrum of gold, handles bad ground and hot rocks, and gives me a huge amount of information in understanding the ground I am working and the ability to make changes quickly and precisely. The Axiom tagline says it best: Find More Gold.
I have only scratched the surface of the Garrett Axiom. Frankly, I could easily write at least another page and would require a lot of visual space. Which gave me an idea: Over the course of the next few months, I will be creating a video series on the Axiom where I will be in the field sharing not only the functions of the Axiom, but how I use each function to my type and style of nugget hunting. This will give you the opportunity to see and hear exactly what I do in the field. These videos will be on the GPAA Gold Trails YouTube channel, https://bit.ly/GoldTrails. If you are kind enough to subscribe to the channel, please hit the bell to get notifications for videos as I post them.
Until we meet up out there in some nugget patch, be good to yourself and get out and prospect.
- Kevin Hoagland
I just purchased my axiom how do I get the lifetime membership?

Excellent! Garrett! “Now we want a sub $2,000.00 TDI SL PRO” with a 12 and 7.5" coil set running at 16.8 volts… and we want 12 and 7.5" coil covers for the older TDI’s… and we want a GMT 24K that runs at 24K, 34K and 48K with an instructional DVD video, paper owners manual and a new display inerface menu that we can understand.
Anything else: No! I think that’s about it!

Where is your convention. Would like to see detector in person


5 comments